Description
Provenza Molding and Transitions
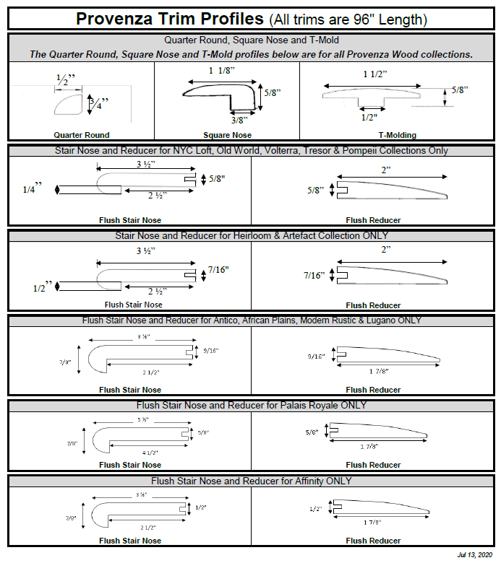
Provenza T-molds
are used to transition between hard-surface floors of similar height. the floor does not need to be exact in height to make these work but they should both be hard surfaced floors otherwise the T-mold can break.
They are called a T-mold because they are shaped like a “T”, so if one side is sitting on carpet or another soft-surface floor that does not firmly support the “T” then they can crack over time.
T-molds should not be used in situations where the floors are severely uneven with each other. In this case using a reducer might be better suited to transition the gap between the two floors.
Provenza Molding – Reducer
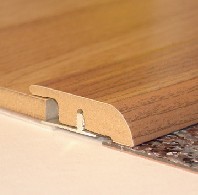
are usually used where the new floor meets existing concrete or a floor that is equal in height to the bottom of the new floor. Also very common in applications where the new floor is laid on top of an old floor but stops at a doorway exposing the the old floor in the adjacent room.
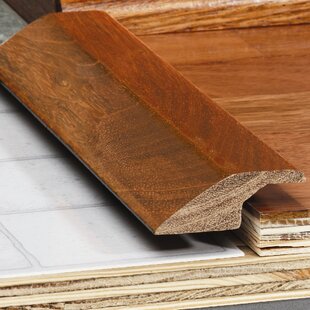
Some installers prefer to use Reducers at doorways where the floor meets carpet, This helps hide any imperfections in the cut edge as well as providing protection for your feet against the potentially sharp edge of the floor, While giving a finished overall look. You can often interchange reducers for Endcaps depending on the height difference of the two floors
 Provenza Molding – Endcaps
are usually used where the new floor meets existing concrete or a floor that is equal in height to the bottom of the new floor. Also very common in applications where the new floor is laid on top of an old floor but stops at a 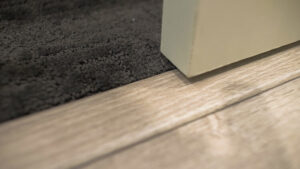 doorway exposing the the old floor in the adjacent room.
Some installers prefer to use Endcaps at doorways where the floor meets carpet, This helps hide any imperfections in the cut edge as well as providing protection for your feet against the potentially sharp edge of the floor, While giving a finished overall look
Uses for Quarter-Round and Shoe Moldings
Both quarter-round and shoe moldings are long, flexible lengths of wood such as hemlock, oak, or pine, MDF, or even polystyrene. Both trim moldings start as long round dowels that are then rip-cut and milled into their respective shapes. 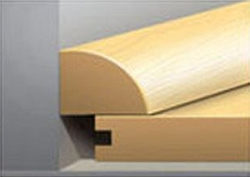
Both types of molding are stocked in very long lengths, racked vertically at the home improvement store or lumber center. This extra-long length is so that you can use full-length pieces to cover most walls. Although you can join shorter pieces to cover a long wall using scarf joints, most carpenters try to avoid this since full-length pieces give a smoother look.
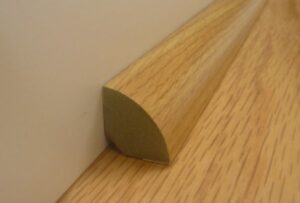
Shoe and quarter-round moldings are quite flexible, intended to bend and conform to the floor profile. Don’t worry about buying perfectly straight pieces; they can easily be bent into place during installation.
Baseboards tend to be straight and inflexible, yet floor coverings often are not. Sags between joists are common in older homes, and even in new installations, it can be difficult to get the floors perfectly flat and smooth. How to fix this gap?
Sometimes, homeowners and even installers will inject caulk in this space. Caulked baseboards are usually preferable to gapped baseboards that are unsightly and permit energy-wasting drafts, but they are still not the most elegant solution. Installing quarter-round or shoe molding is a better option.
What Is Shoe Molding?
Also known as “base shoe,” shoe molding is a decorative detail that consists of a thin strip of wood that’s either painted or stained to match the trim, and it fits in the right angle created by the floor and baseboard.
Baseboard molding installations are very often finished off with an additional thin piece of molding called quarter-round or shoe molding that covers the gap between the bottom of the baseboards and the floor. It’s an easy installation that costs little and gives your floors a precise, polished look. Carpenters like to use these bottom trim pieces because they reduce the need for complicated baseboard scribe cuts.
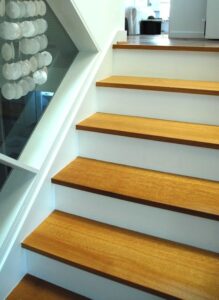
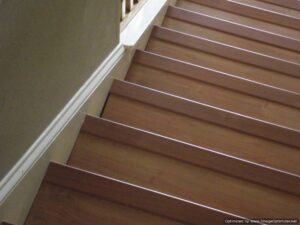
Provenza Molding -Flush Stair Nose for Wood or Laminate Floors
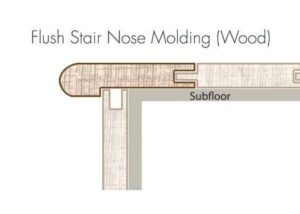
With flush stair nose molding the tongue and groove configuration is used to secure the nose to the floor overlay and the stair underlayment. This offers a smooth surface transition between the stair nose and the floor. In ideal situations the wood color is identical for a appealing look and feel. It is dependent on the manufacturer to provide proper complementary stair nose molding. If customized flush molding cannot be found then the installation might need to use overlap molding described below.
Expansion gap considerations are less important for stair tread placement because the amount of material is small and the expansion slight. Still a mall gap should be allowed where the tread meets the riser. This gap would then be covered by the riser overlay. Overlap stair nose molding can be used in combination with flush molding to accommodate transaction at the top of the stairs, where it would be transitioning from a differing floating floor down to the first step.
Flush stair nose pieces are installed by construction adhesive the flush stair nose to the subfloor using. In addition, using two 8 penny face nails, nail down the flush stair nose approximately 3 inches. in from each end as well as in the center of the flush stair nose piece. If the stairs are extra long, make sure to face nail two 8 penny finish nails at approximately every 20 inches of the molding.
Provenza Molding – Overlap Stair Nose for Wood or Laminate Floors
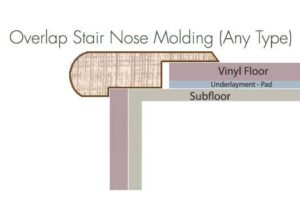
Floating applications require a different kind of Stair Nose: one which can allow for the required expansion gap for floating hardwood or laminates. Overlap Stair Noses have a small protruding piece which overlaps the floating floor and hides the expansion gap, leaving room for free movement of the floating floor. As you can’t float floor boards on individual stairs, the boards need to be attached to the individual stair surface. Overlap Stair Nose pieces are typically only used at the top of the staircase, where it would be transitioning from a floating floor down to the first step.
Overlap Stair Nose pieces are installed a lot like Flush Stair Nose pieces. Glue the Overlap Stair Nose to the subfloor using construction adhesive, making sure to leave enough room for the required expansion gap. In addition, using two 8 penny face nails, nail down the Overlap Stair Nose approximately 3 inches in from each end as well as in the center of the Overlap Stair Nose piece.
If the stairs are extra long, make sure to face nail two 8 penny finish nails at approximately every 20 inches. of the molding. It’s important, with Overlap Stair Nose pieces, that you remember to attach the molding to the subfloor and not to the floating floor you’re overlapping.
Stair Cap Molding for Wood or Laminate Floors
A 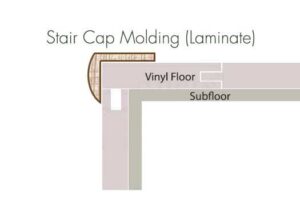
The cap will also extend below the nose to cover any transition between the nose and the riser. The diagram shows a simple stair nose that does not protrude out over the riser. Check with the star nose manufacturer for dimensions to be sure it will work for your application.
Flush Stair Nose
Overlap Stair Nose


